
Blog
Pro Flat Lay Tips 2026: A Solo Creator’s Guide to Stunning Shots
For the busy creator, professional results come from mastering the basics. These are the essential flat lay tips that will elevate your product photography:
- Master your lighting. Soft, diffused light banishes amateur shadows and is the single most significant factor in achieving a high-end look.
- Tell a clear story. Every prop should serve the hero product, building a cohesive narrative, not creating visual clutter.
- Use a stable setup. A dedicated tripod with an overhead arm guarantees sharp, consistent shots and frees your hands for styling.
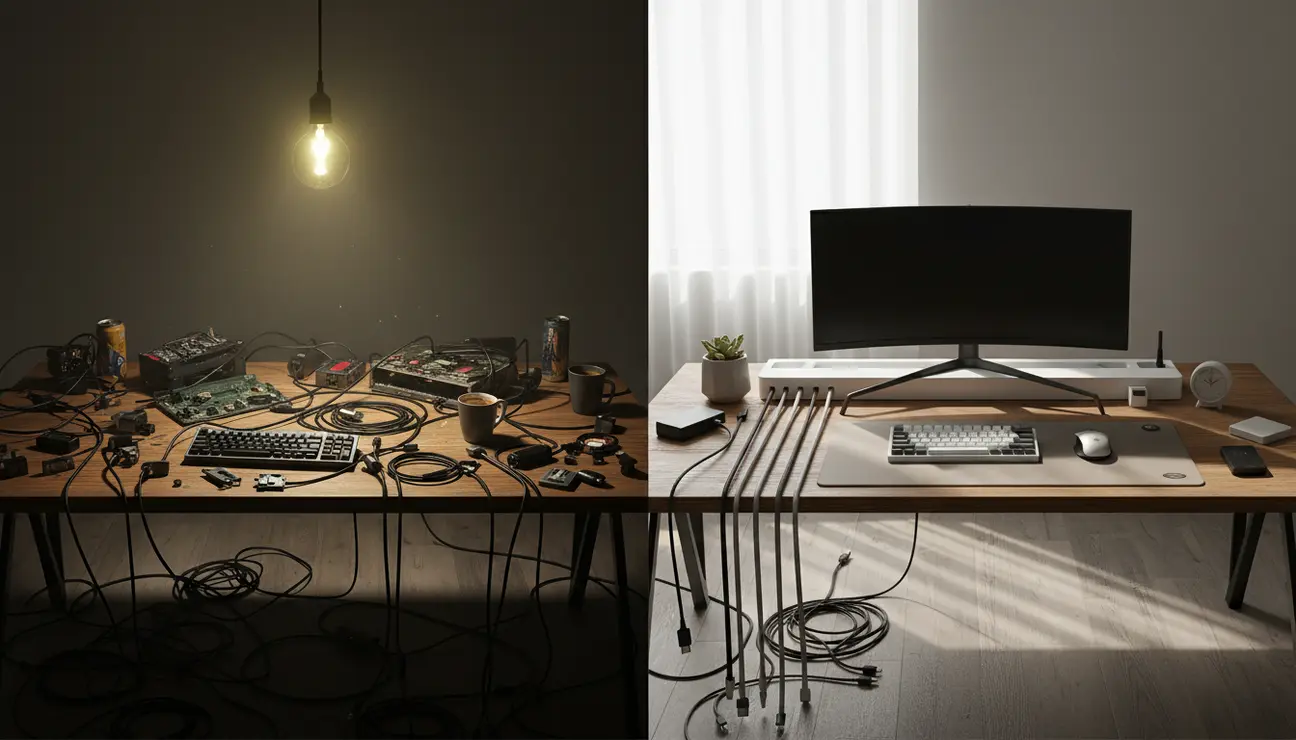
From Cluttered Chaos to Compelling Content
Look at the chaos of a rushed setup. Harsh shadows from a single overhead lamp, distracting reflections, and props that seem to fight for attention. We have all been there: spending hours arranging products only to capture an image that feels amateur, failing to reflect the quality of the item itself.
This is the common barrier between immense effort and professional results. It’s the visual noise that prevents your work from connecting with your audience. On the other side is calm, balanced composition under soft, diffused light—a shot that looks intentional, professional, and appealing.
Is This Guide for You?
This guide is for the solo creator, the small business owner, the aspiring product reviewer. It is for anyone who needs to produce high-quality product imagery without a large team or a lavish budget.
These are not complex technical hacks. They are foundational principles for working smarter, not harder, to achieve the clean, professional aesthetic your work deserves.
Upgrade Your Studio Lighting?
Control your light and get repeatable, studio-quality results, day or night.
Tip 1: Master Your Light, Banish the Shadows
The Chaos: Harsh, unflattering shadows cast by a single ceiling light or direct sun. They flatten texture, distort colour, and make even premium products look cheap. Inconsistent window light means your shots from Monday look completely different to your shots from Tuesday.
The Zen: The goal is soft, diffused light. This wraps gently around your products, creating subtle, dimensional shadows that reveal form and texture. To achieve this, use the largest window you have on a day with overcast skies—the clouds act as a giant, natural diffuser. Alternatively, use a single lamp and bounce the light off a large piece of white foam board onto your scene.
- Pros: Instantly improves image quality, costs nothing with natural light.
- Cons: Natural light is unpredictable and time-limited.
> Pro Tip: Always place your primary light source at a 45-degree angle to your setup. This creates soft, dimensional shadows that add depth, rather than the flat, harsh shadows from a direct overhead light.
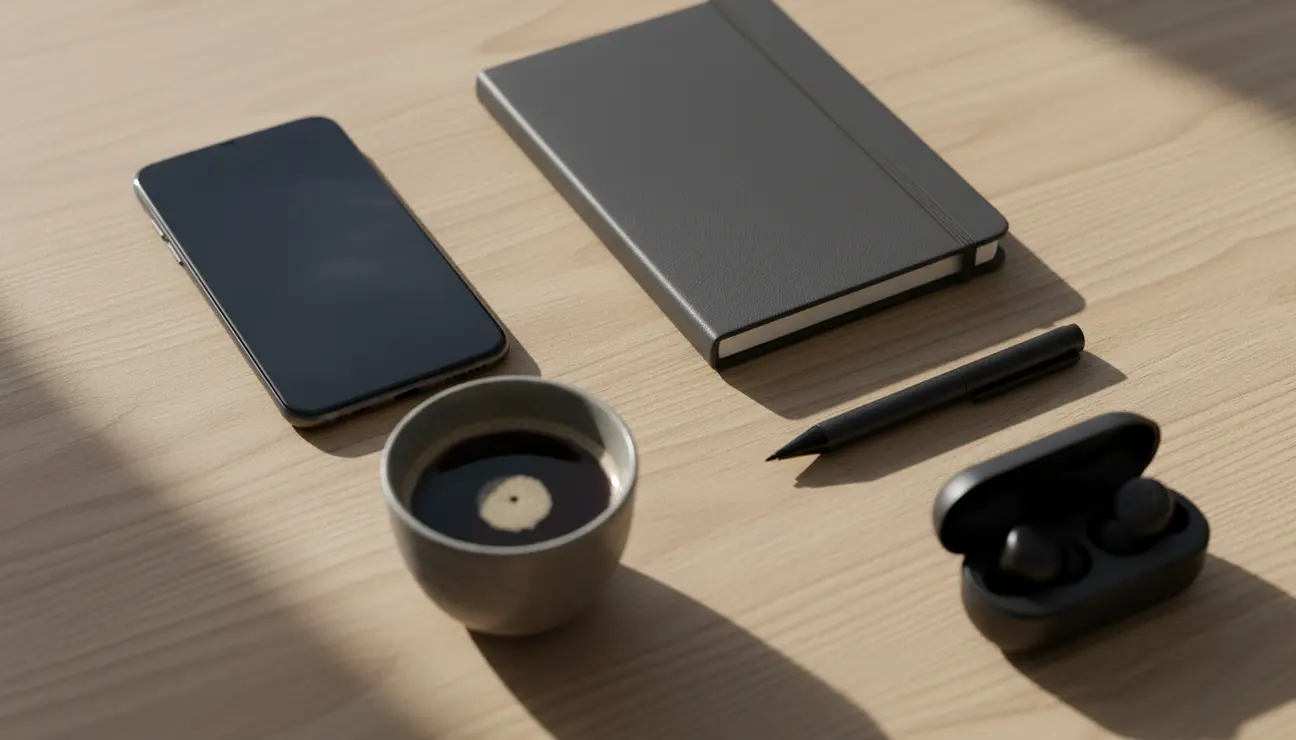
Tip 2: Tell a Story, Don’t Just Show an Item
The Chaos: A random assortment of props that distracts from the main product. A coffee cup, a plant, a pair of glasses, and a keyboard might all be interesting on their own, but together they create visual noise that confuses the viewer.
The Zen: Build a clear narrative. Before placing anything, decide on the story. For a new blend of coffee, surround it with carefully placed roasted beans, a beautiful ceramic mug, and a notebook suggesting a quiet morning ritual. For a piece of tech, pair it with its essential cables neatly arranged and a clean, minimalist background. Select only two or three supporting props that enhance the story of your hero item.
- Pros: Increases audience engagement, creates a memorable brand aesthetic.
- Cons: Can look cluttered if overdone; restraint is key.
> Mindful Moment: Before you place a single prop, ask: ‘What one feeling do I want this image to evoke?’ Let that question guide every choice you make.
Tip 3: The Zentic Porta-Light V2 for Perfect, Repeatable Results
The Chaos: The deep frustration of inconsistent natural light. Your best creative time is in the evening, but the light has gone. You complete a product shoot one day, but the next day is brighter, and the new shots simply do not match.
The Zen: This is where control becomes your most valuable asset. The Zentic Porta-Light V2 is a compact, portable LED panel designed for the serious creator. It delivers perfect, daylight-balanced light with a high Colour Rendering Index (CRI). A high CRI is non-negotiable for accurate product colours, ensuring what you shoot is what your customer sees.
With stepless dimming and an included diffuser, you can craft that soft, professional look on demand, at any time of day. This is not just a light; it is control, consistency, and a repeatable studio-quality setup that fits in your hand.
- Pros: Studio-quality light in a portable size, ensures true-to-life product colours (High CRI).
- Cons: An initial investment compared to free sunlight.
> Pro Tip: Use two Zentic Porta-Light V2 panels at 45-degree angles on opposite sides of your setup to completely eliminate shadows for an ultra-clean, high-key product shot.
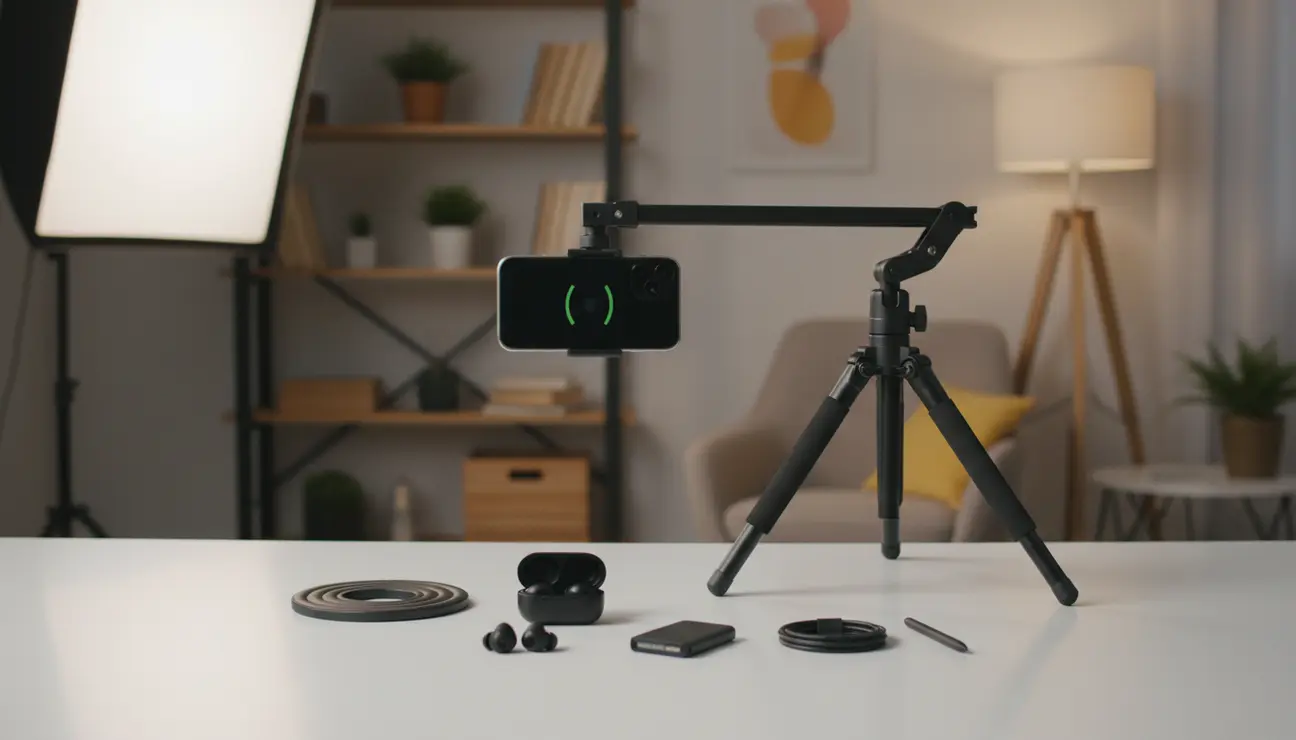
Tip 4: Stability is Non-Negotiable
The Chaos: The tell-tale ‘amateur shake’. Slightly blurry photos and wobbly video clips that come from shooting handheld from an overhead angle. This subtle instability can undermine all the hard work you’ve put into lighting and composition.
The Zen: The solution is a sturdy tripod equipped with an overhead arm. This simple piece of kit is the bedrock of professional flat lay photography. It guarantees pin-sharp focus in every shot and allows you to use both hands to meticulously arrange items in your scene while viewing the composition live on your camera or phone screen.
- Pros: Guarantees sharp, professional images, frees up your hands for precise styling.
- Cons: A good tripod with an extension arm requires a small budget.
> Mindful Moment: Using a tripod forces you to slow down. It encourages you to be more deliberate with your composition. This enforced pause almost always leads to a better final image.
Your Next Step to a Perfect Flat Lay
Of all the flat lay tips you will learn, mastering your lighting has the single greatest impact on the quality of your final image. Start by using a large window and a simple white reflector.
When you are ready to eliminate inconsistency and shoot on your own schedule, the most significant upgrade you can make to your toolkit is a controlled light source. Investing in the Zentic Porta-Light V2 provides the consistency and quality needed to elevate your work from hobbyist to professional.
Frequently Asked Questions About Our Flat Lay Tips
1. What’s the best camera angle for a flat lay?
Directly overhead, at a 90-degree angle to the surface, is the classic flat lay position. Use the gridlines on your phone or camera to ensure your lens is perfectly parallel to the table. This creates a clean, graphic look.
2. How do I avoid reflections on shiny products?
Reflections are caused by your light source. The key is to move your light or your product until the reflection disappears. A diffuser is your best tool here; it softens the light, scattering it to minimise these harsh specular highlights.
3. Can I take good flat lays with just my phone?
Absolutely. Modern phone cameras are incredibly capable. The secret to a great flat lay is not the camera, but the lighting, composition, and stability. Mount your phone on a tripod with an overhead arm and focus on mastering the other tips in this guide.
Ready to Build Your Pro Studio?
From controlled lighting to tripods, find the essential pro gear to elevate your content.