
Blog
The Ultimate Monitor Arm Setup Guide for a Clutter-Free 2026
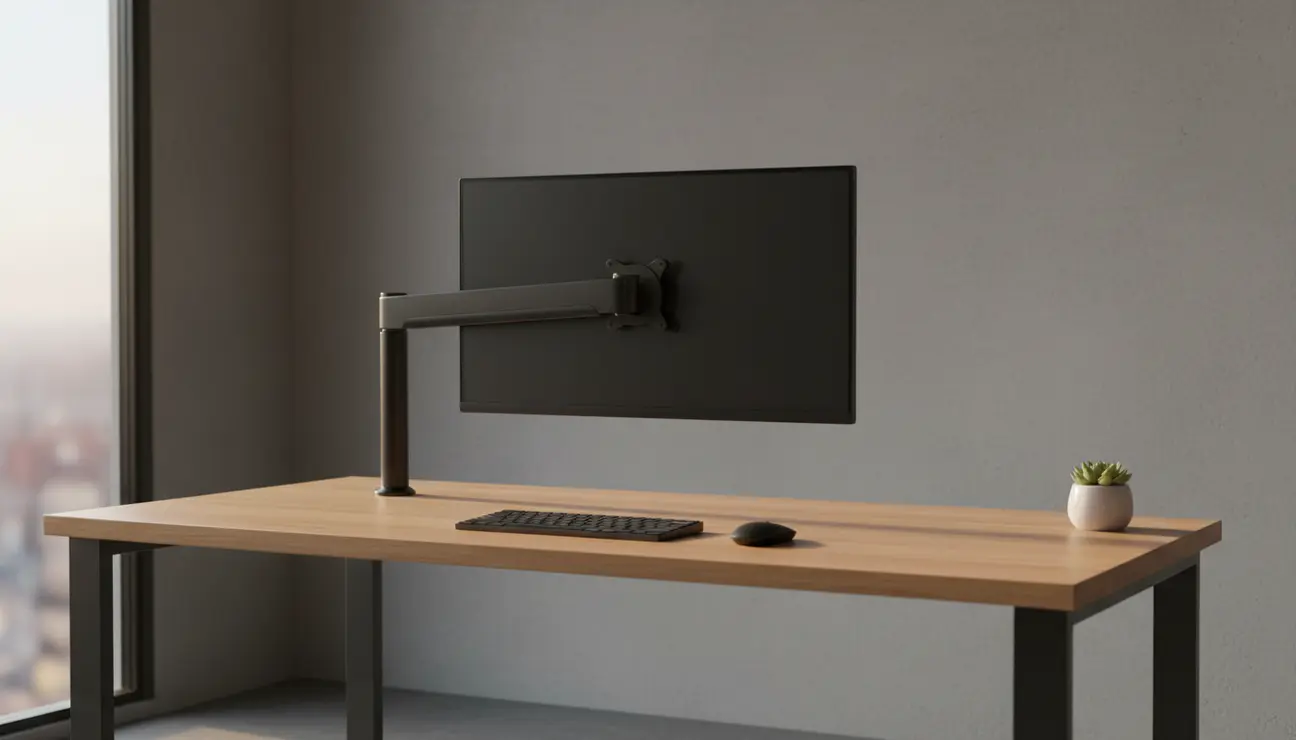
Consider the typical workspace on the left: a monitor consuming prime desk space, a nest of cables creating visual static, and a posture slowly collapsing under the strain. Now, observe the space on the right: the screen floats effortlessly, the surface is clear, and the entire environment breathes calm. This transformation is not about buying a gadget; it is about executing a proper monitor arm setup to install a system for focus.
Monitor Arm Setup Essentials
For the professional who measures time in output, here are the core principles for reclaiming your workspace.
- VESA Compatibility is Mandatory: Your monitor must have a 75×75 mm or 100×100 mm mounting pattern. This is the industry standard and non-negotiable.
- Measure Your Desk Thickness: Before purchase, confirm your desk’s thickness in millimetres. Most quality arms accommodate a wide range, but verification prevents failure.
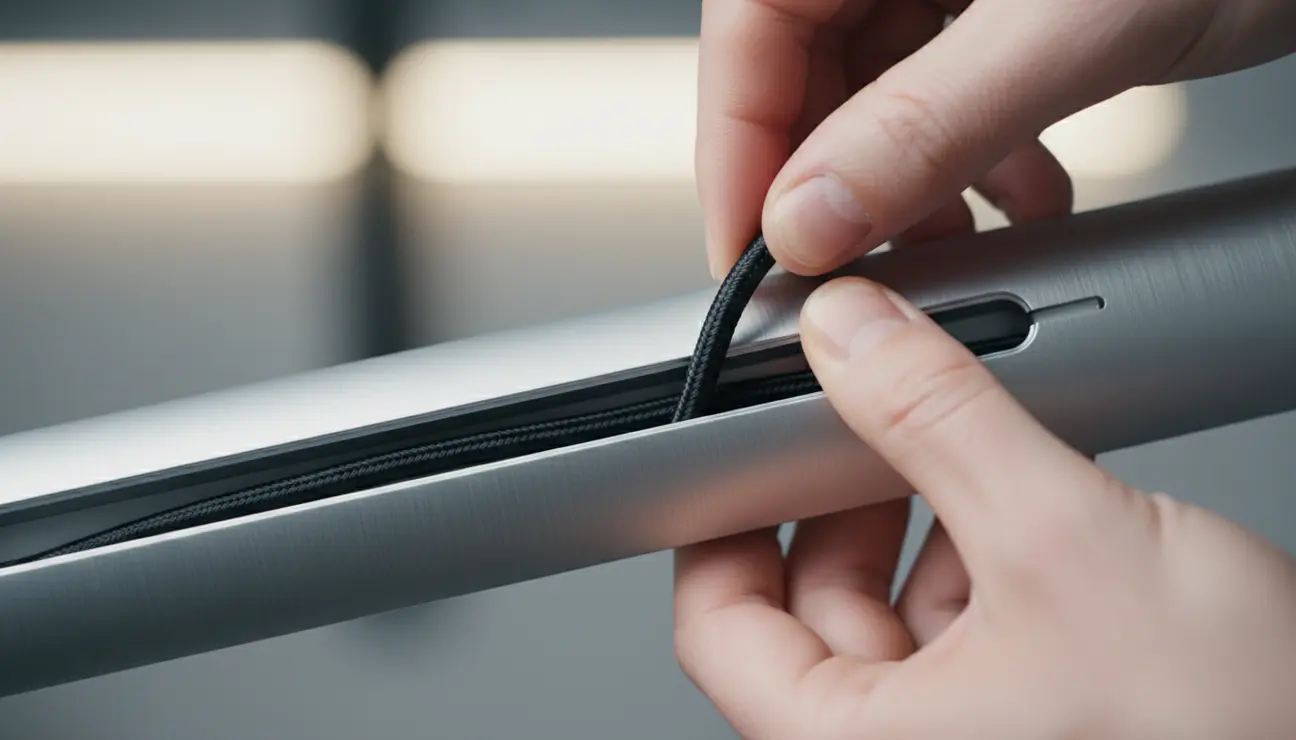
- Integrated Cable Management is Key: The defining feature of a minimalist setup is the absence of visible cables. Prioritise an arm with built-in channels.
- Correct Tension is Everything: The ability to perfectly counterbalance your monitor’s weight is what allows for the fluid, one-touch adjustment that defines a superior arm.
Why Your Standard Monitor Stand is Silently Killing Your Focus
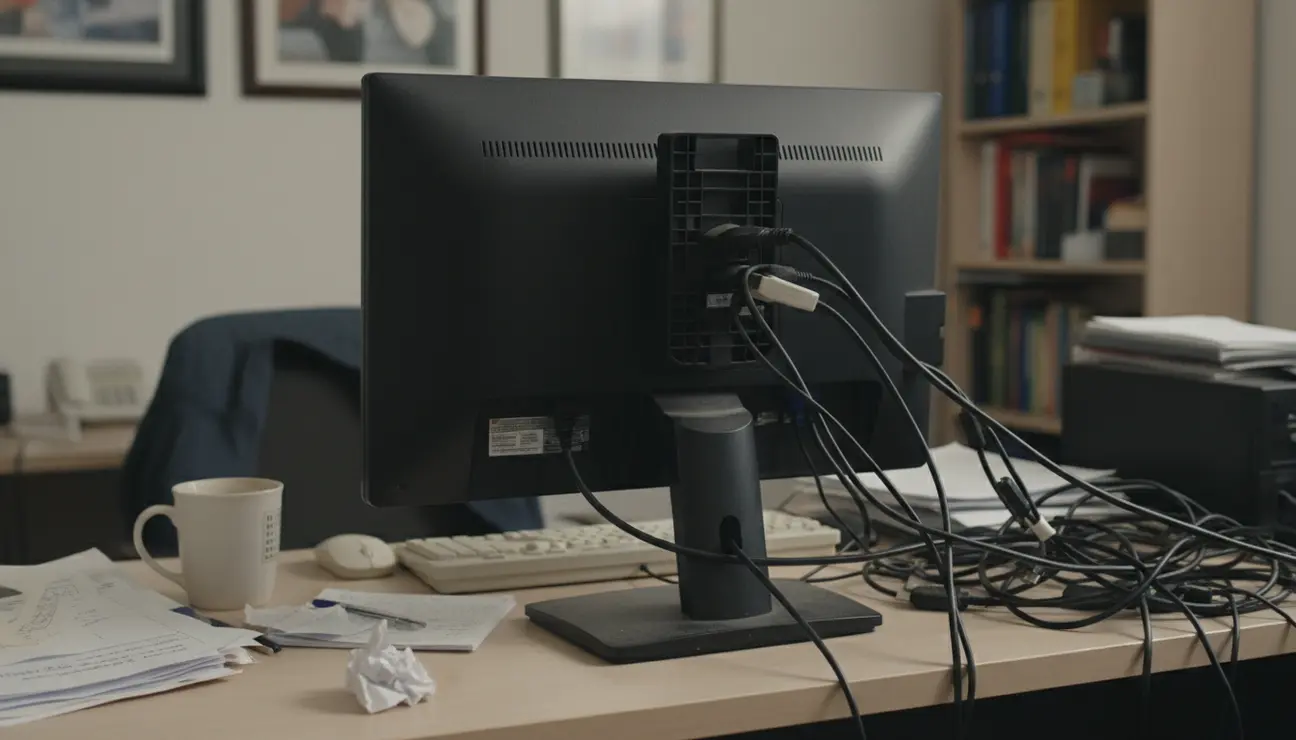
The plastic stand included with your monitor is a primary source of workspace inefficiency. It occupies a significant footprint, stealing valuable real estate that could be used for focused tasks. Its fixed, non-ergonomic height forces your body into unnatural positions, leading to persistent neck and shoulder strain that fragments concentration.
This physical clutter is compounded by visual noise. Tangled cables create a subconscious, low-level distraction, serving as a constant reminder of disorganisation. In a role that demands deep work, this environment is a direct impediment to performance. A cluttered desk surface promotes a cluttered mind.
Is This Guide for You?
This guide is for the professional who views their workspace as a tool for focus, not a source of distraction. It is for the creator, the engineer, and the organiser who understands that a streamlined environment is the bedrock of productive thought.
If you are tired of desk clutter, persistent neck pain, and tangled cables sabotaging your productivity, you are in the right place. We will not just be setting up a monitor arm; we will be engineering a more intentional and effective workspace.
The Philosophy of the Floating Screen: More Than Just Ergonomics
Elevating your monitor onto an arm is a strategic decision to reclaim both physical space and cognitive load. A ‘floating’ screen does more than improve posture; it creates a literal and metaphorical space for clearer thinking. By lifting the monitor, you remove a major visual anchor of clutter, allowing the desk to become a pure, dedicated surface for the task at hand.
This aligns with the core philosophy of a minimalist workspace: every element should serve a purpose, and anything that does not should be removed. Let us address the common reservations.
- Stability: A high-quality, properly installed monitor arm does not wobble. The engineering of a solid desk clamp and dense materials ensures your monitor is more stable than it was on its original stand.
- Installation Complexity: The process is straightforward and logical. It requires no specialised skills, only a methodical approach and attention to the core steps.
- Compatibility: The VESA standard has made monitor compatibility almost universal. A quick check of the back of your display is all that is required.
Your Flawless Monitor Arm Setup: A Step-by-Step Guide
A methodical approach ensures a secure and clean installation. We divide this into two phases: the pre-flight check and the physical installation.
Section 1: Pre-flight Check
1. Desk Thickness: Use a ruler or calliper to measure the thickness of your desk at the intended mounting point. This should be between 20 mm and 85 mm for most standard clamps.
2. Monitor Weight: Check your monitor’s technical specifications for its weight in kilograms (kg), excluding the original stand. This value must be within the arm’s specified load capacity.
3. VESA Pattern: Look at the back of your monitor. You will see four screw holes in a square formation. Measure the distance between them; it will almost certainly be 75 mm x 75 mm or 100 mm x 100 mm.
Section 2: Installation
With the preparatory checks complete, the physical process is simple. First, secure the clamp to the desk, ensuring it is tightened sufficiently to be immobile. Next, attach the VESA plate to your monitor. Finally, mount the monitor onto the arm itself. This is often the point where inferior products reveal their flaws, with difficult alignment or unstable connections.
Ready to Eliminate Cable Chaos?
A monitor arm is the first step. Complete your streamlined setup with accessories designed to hide every wire.
o Tip:** Before routing cables, move the monitor through its full range of motion—height, depth, and orientation. This ensures your cables have enough slack and will not be strained when you adjust your screen.
This is the critical juncture where the right hardware makes the difference between a functional setup and a seamless one. For a workspace architected for focus, the tool must match the intention.
The Adjustable Monitor Desk Mount is engineered as the logical solution for this task. Its gas spring mechanism is calibrated for tool-less adjustment, allowing the monitor to be guided with a single touch. The integrated cable management channels are designed to make wires completely disappear from sight. Its single-piece aluminium construction provides a rigid, stable platform that eliminates any concern of wobble or drift. These features directly solve the core problems of clutter, instability, and workflow friction.
Dialling It In: From Setup to a Personalised Workflow
Installation is the foundation; optimisation is what unlocks true performance. Your goal is a personalised ergonomic environment that adapts to you, not the other way around.
Start with data-backed ergonomic principles. Position the monitor so the top edge of the screen is at or slightly below eye level. The ideal viewing distance is approximately one arm’s length from your seated position. This configuration minimises eye and neck strain during long sessions.
Next, perfect the tension. Using the adjustment screw on the arm, tighten or loosen it until the monitor’s weight is perfectly counterbalanced. The goal is a state of equilibrium: the screen should stay exactly where you put it, yet move effortlessly with minimal pressure.
Cable Routing Mastery
This is the final step to achieving the ‘floating’ aesthetic.
1. Feed the monitor’s power and display cables along the arm, securing them within the integrated channels.
2. Ensure there is enough slack at each pivot point to allow for full movement.
3. Use supplementary cable ties or sleeves to bundle the cables together as they run from the base of the arm to their destination. The objective is a single, clean line, or complete invisibility where possible.
Beyond the Arm: Creating a Cohesive, Focused Workspace
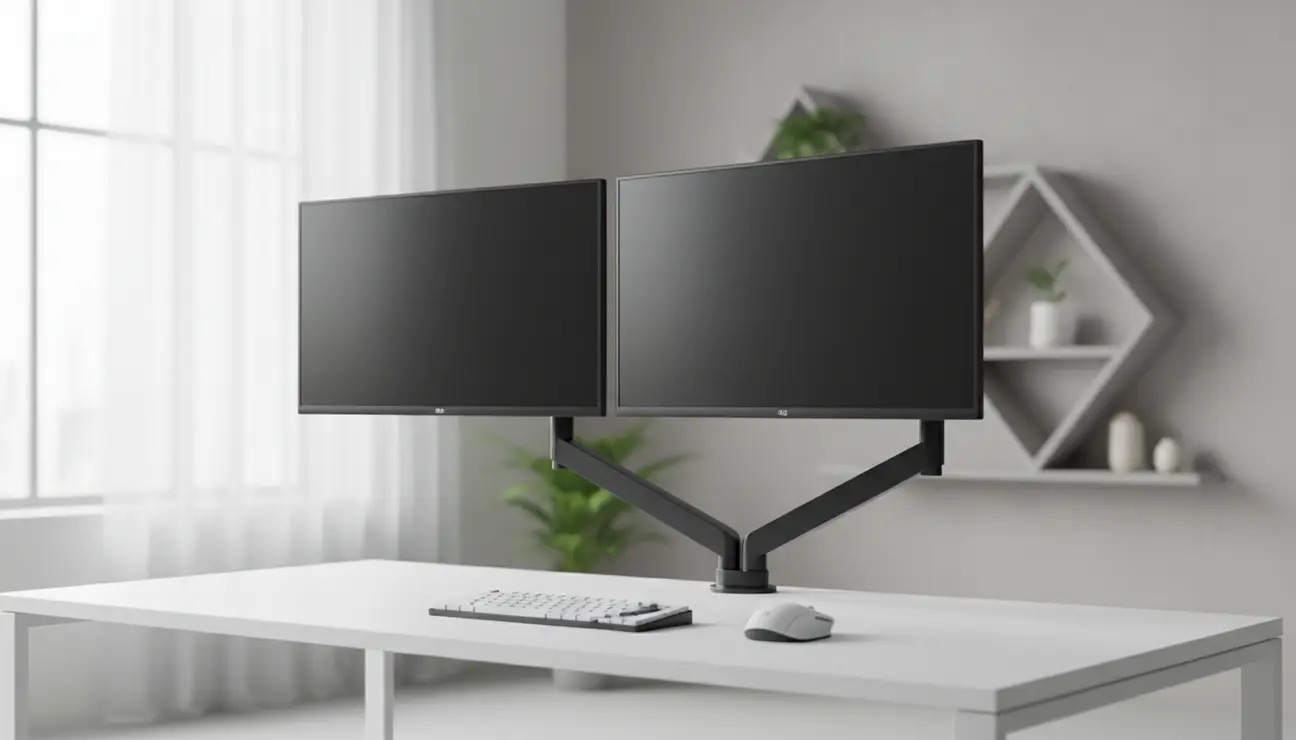
A monitor arm is the centrepiece of a minimalist productivity ecosystem. Its primary benefit—reclaiming desk space—enables further optimisation. The newly available surface can now accommodate a vertical laptop stand, creating a clean dual-screen setup, or a desk shelf to elevate essential tools and create organised storage.
When considering a dual monitor setup, two independent arms offer the most flexibility, allowing for perfect alignment and individual adjustment for different tasks. This prevents the clutter of two separate stands and maintains the clean, minimalist aesthetic.
Be wary of inexpensive, generic arms. Their weaknesses often manifest as gradual drooping over time, clamp designs that damage the desk surface, and poorly designed cable management that fails to conceal wires effectively. A quality build is an investment in stability and longevity.
Your Desk, Reclaimed
The transition is stark. You began with a cluttered, distracting desk that dictated your posture and fragmented your focus. You now have a streamlined command centre, an environment engineered for clarity and deep work. The monitor floats, the surface is clear, and the technology has become a silent partner rather than a source of friction.
By systematically removing visual noise and ergonomic roadblocks with a proper monitor arm setup, you are not just organising a desk; you are creating the conditions for your best work. A clear desk enables a clear mind.
Frequently Asked Questions (FAQ)
1. Will a monitor arm damage my desk?
A well-designed arm will not. Quality clamps use soft padding to protect the desk surface and are engineered to distribute pressure evenly. As long as your desk is made from a solid material (not hollow-core) and you do not exceed the arm’s weight limit, your desk will be perfectly safe.
2. How do I confirm my monitor is VESA compatible?
Look at the back of your monitor. You will find four screw holes arranged in a perfect square. To confirm the size, measure the horizontal and vertical distance between the centre of the holes. It will typically be either 75 mm or 100 mm. This is the VESA standard.
3. Is a gas spring arm functionally superior to a mechanical one?
Yes, for dynamic workflows. A mechanical (or spring-assisted) arm often requires you to loosen a joint to reposition the monitor. A gas spring arm is perfectly counterbalanced, allowing for fluid, on-the-fly adjustments with a single touch. This is superior for users who switch between sitting, standing, or collaborative work and require frequent, effortless screen repositioning.
Optimize Your Entire Setup
Your monitor arm is the foundation. Explore our curated collection of minimalist tools to build a space engineered for pure focus.